


This one is for all my friends at home who are living their best quarantine life. In other words, it’s for those of you just trying to create some order in a time of chaos. I see you. Let’s be honest, it’s a crazy time and all of us are trying to make sense of the senseless. When so many things are out of control, what really helps me is focusing on the things I can control, like matching loungewear and my color-coordinated Post-it collection. Getting my life in order, even in baby steps, always helps me stay calm.
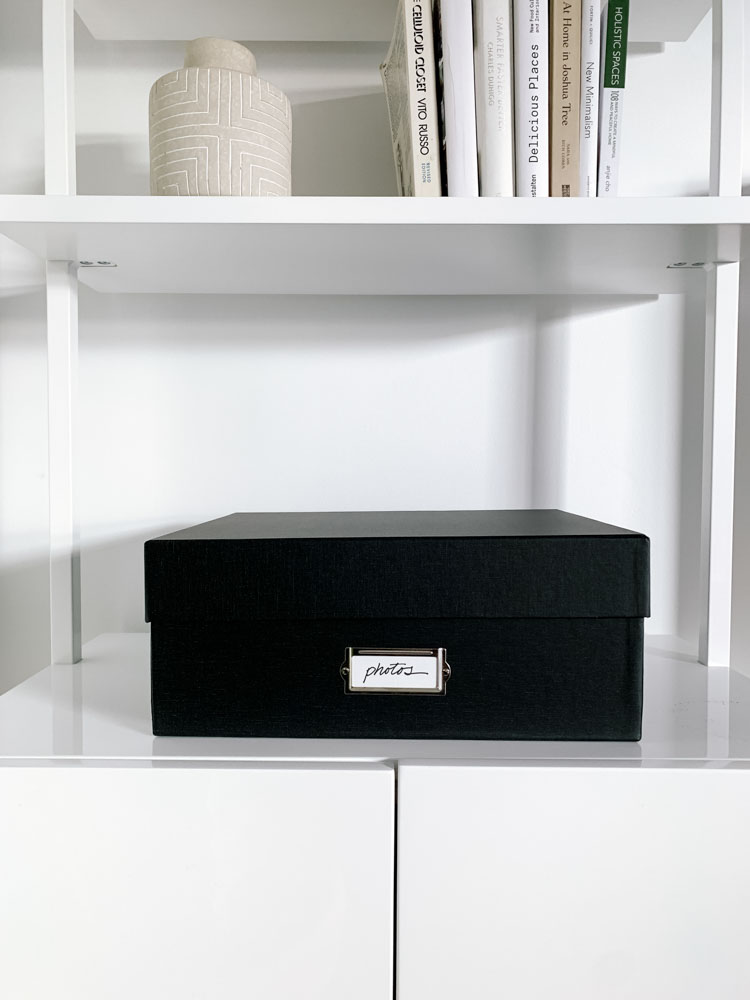
With that in mind, I have been working hard behind the scenes to introduce archival storage boxes for all your photo, greeting card, and memento needs. Many of you have messaged me about how you can get your hands on these archival-quality boxes, and I am happy to say they are available for sale on our shop.
If you are looking for a little inspiration and guidance to get your printed photo collection organized, we are here for it. In fact, I have an entire chapter in my book, Simply Spaced: Clear the Clutter and Style Your Life, dedicated to photos and photo organizing. Download the free photo organizing worksheets from my book for a little extra help.
How to organize your printed photo collection:
SIMPLIFY: Declutter your piles of pics.
1. Complete worksheet 1. Start with your why. Get clear on the goals you have for your photos. Why is it important for you to preserve your memories?

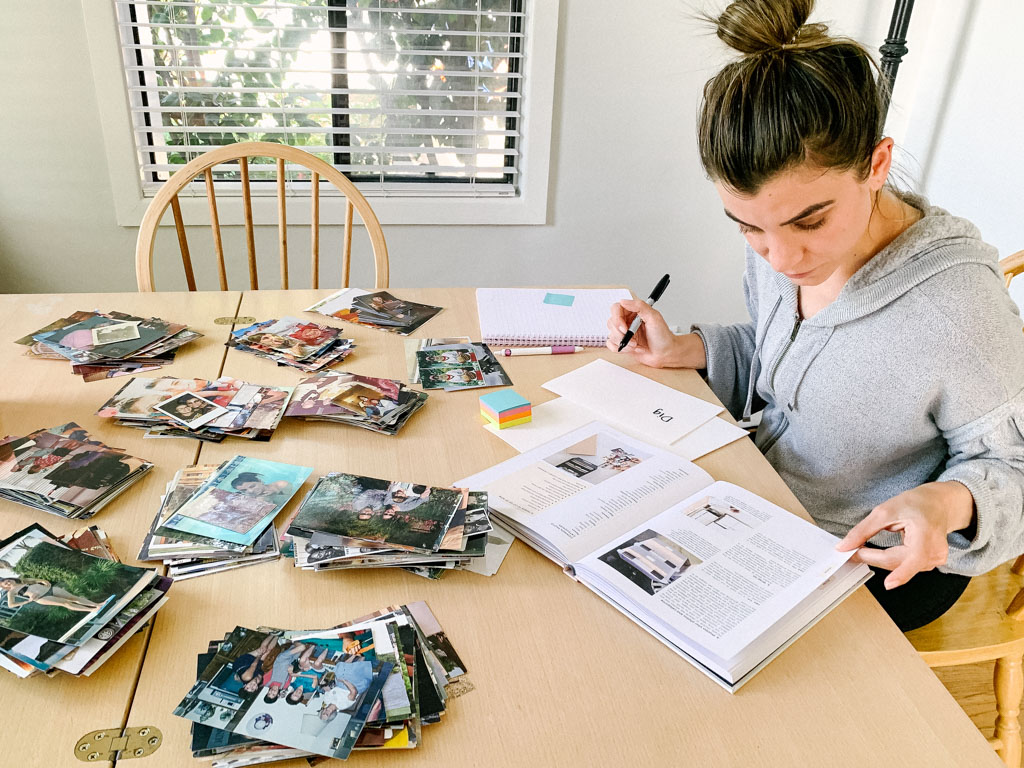
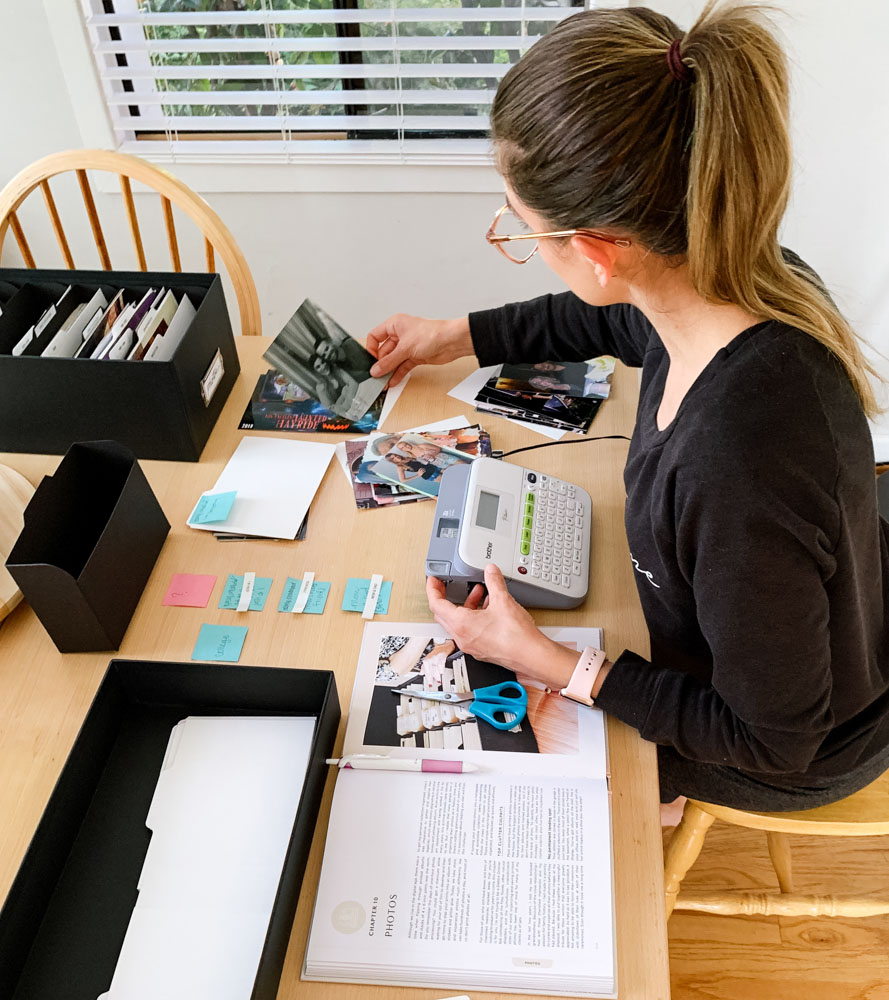
2. Set up your workspace. Grab a notebook, pen, sharpie, Post-its, trash bags, rubber bands, and some sorting bins. Optional: dental floss, cotton gloves, photo pencil, index cards, photo box.
Pro Tip: I love having dedicated tools like a special pen to motivate completion. I’m loving a stylus/ballpoint pen like this for everything from project planning (notes and ideas) to completion (editing scanned photos on an iPad with the stylus). Currently, the team is giving these Custom Pens as special keepsakes to clients organizing photos and capturing fond memories. If you are not in DIY mode, we’re here for you.
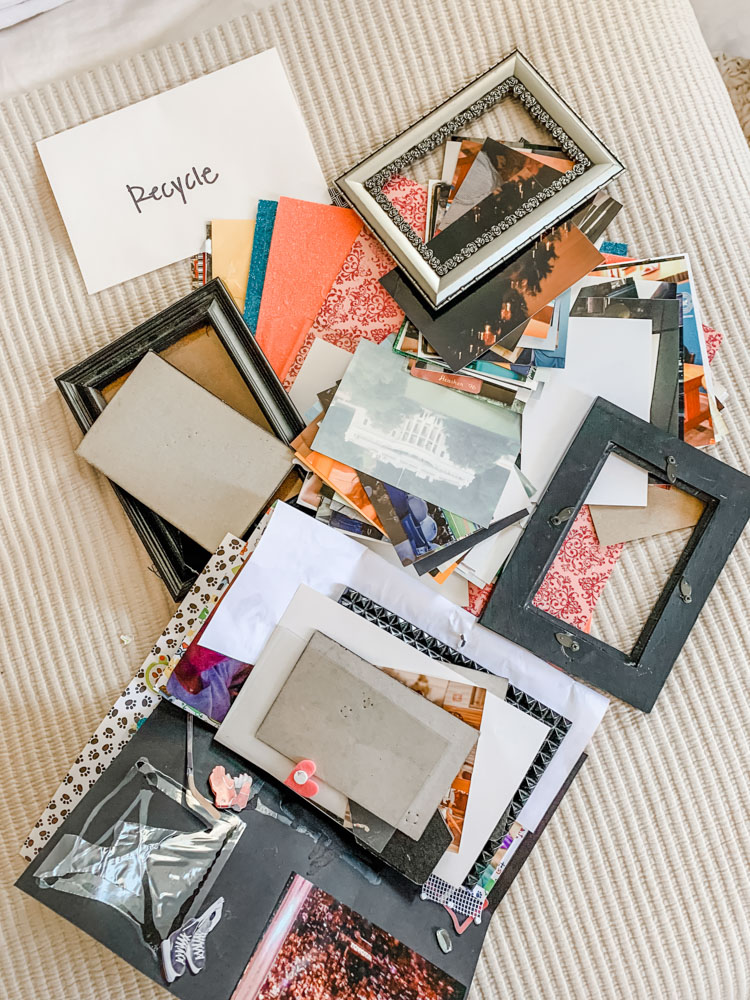
3. Pull everything out and group like with like. Gather your printed photos, albums, and any other photo-related items like frames. Separate any mementos.
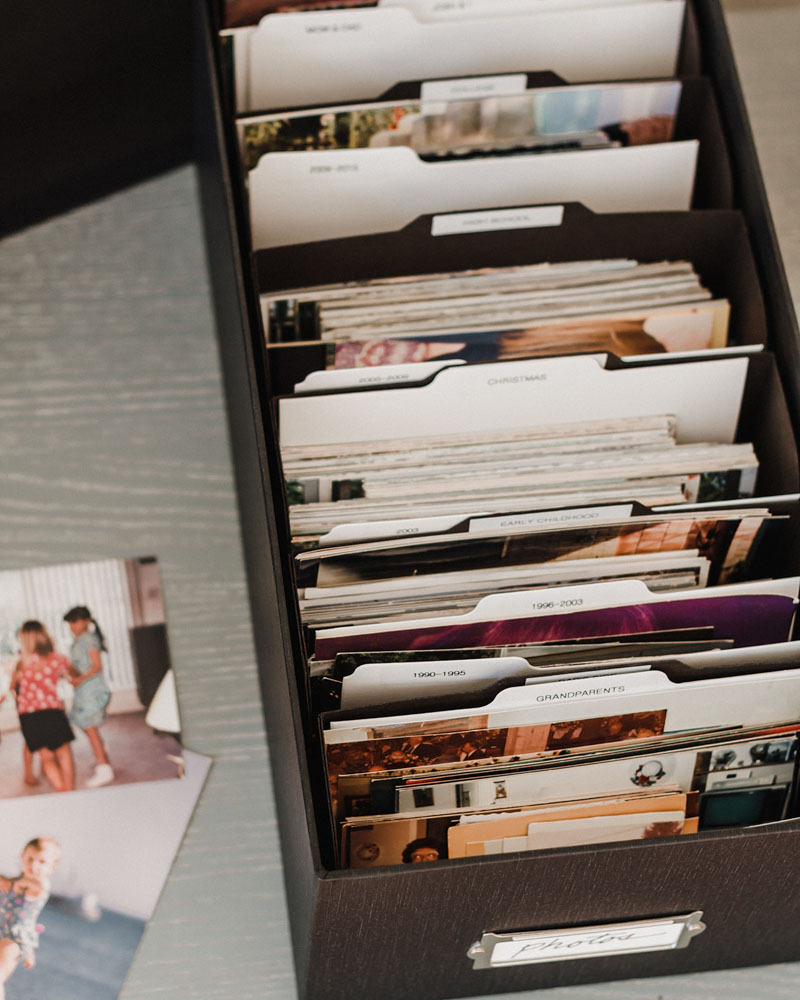
4. Process your photos and categorize. Discard or recycle any photos that you do not love, need, or care about, including blurry images, dupes, and bad memories. Categorize your photos into common categories. PRO TIP: There is no hard and fast rule here. You can categorize by a person, family, event, theme, holiday, date, and time, etc.

STREAMLINE: Optimize your photo collection
1. Complete worksheet 2. Think about what you want to do with your photos. How would you like to access them? Do you want to scan and store, scan and toss, or just organize for now? Use the worksheet to guide you.
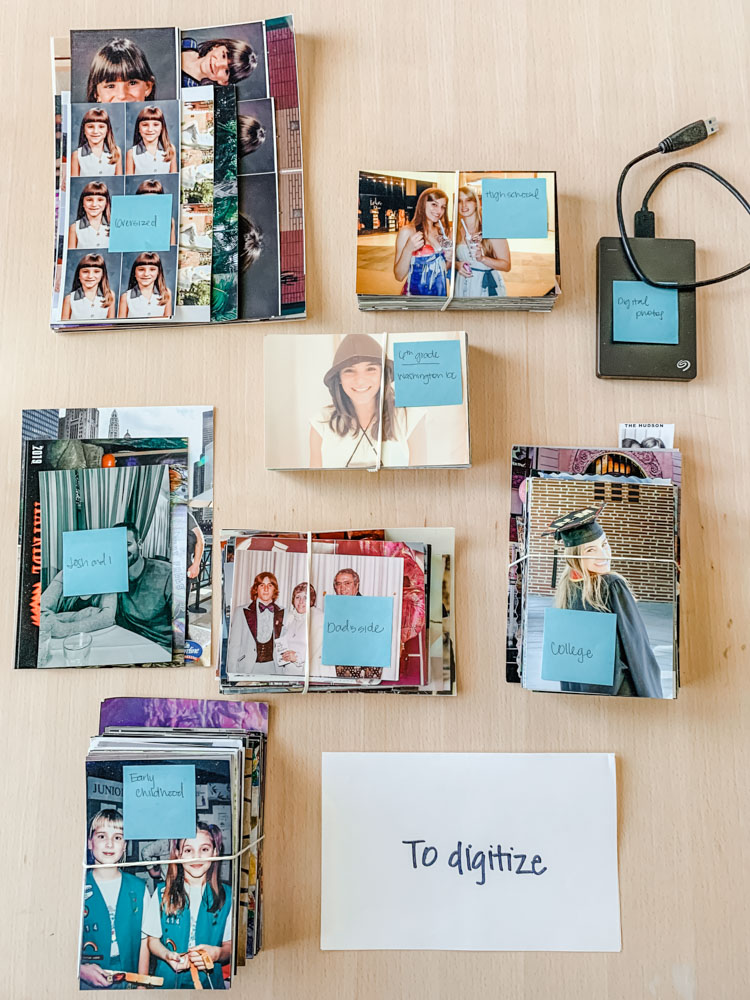
2. Double-check your collection. Is it in the right order? Are you happy with your categories? Order your photos in a relative chronology within categories before you scan or store them.
3. Scan your photos. Scanning at home is easier than ever, but if you’re not the DIY type, you can outsource this step. Keep your categories labeled if sending off, and make sure they are scanned at a minimum of 600 dpi.
4. Identify and cull your favorite photos. Flag, star, or highlight any photos you want to frame, resize, or send to a friend.
5. Back up your collection. To preserve your memories over time, professional organizers recommend backing up your photos in three places: an external hard drive, a cloud, and a safety deposit box, for example. When uploading personal photos to cloud platforms or accessing files remotely, tools like VeePN can add an extra layer of privacy and protection while managing sensitive digital memories online.
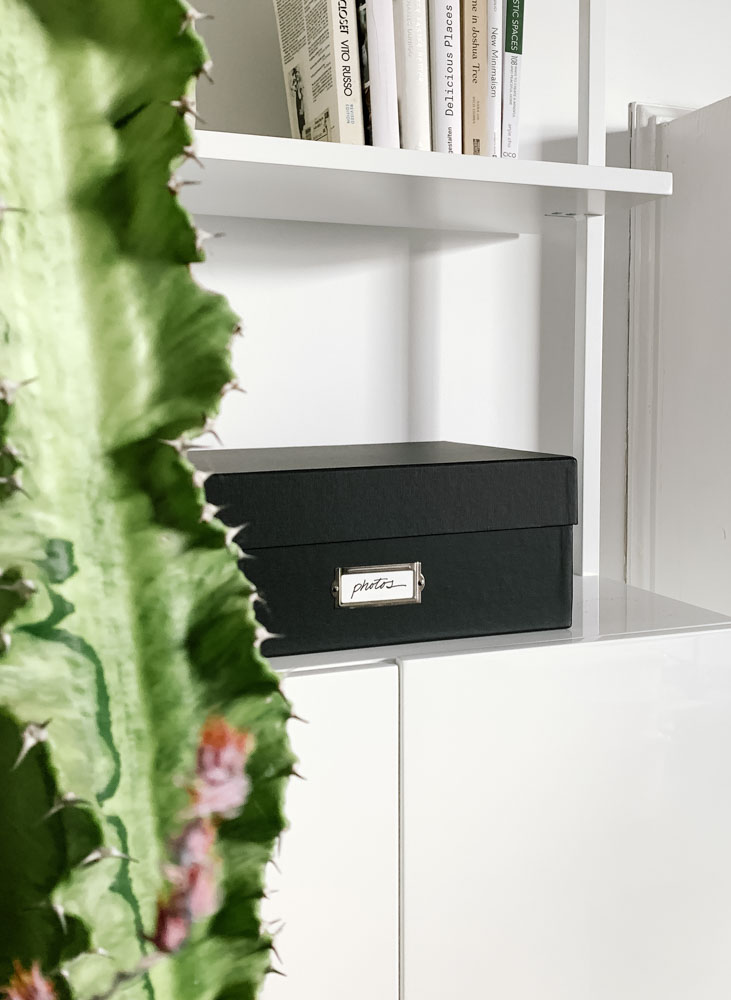
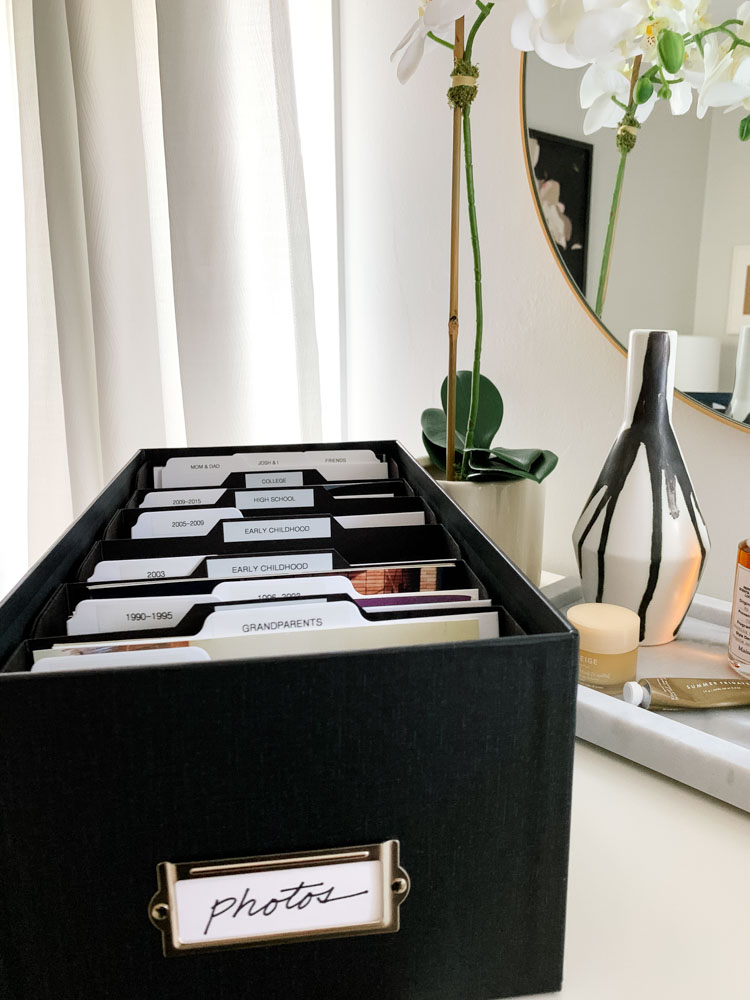
6. Implement storage. Once your photos are scanned, backed up, and saved, store your printed collection in our acid-free archival storage box. BONUS: Add an extra layer of protection with a weather-tight storage bin if storing in the basement, attic, garage, or anywhere exposed to the elements.
7. Label. Once your photos are organized into storage containers, label the outsides of the boxes, main and subcategories. PRO TIP: Use handwritten labels or my favorite P-Touch label maker.
STYLE: Curate your photo collection
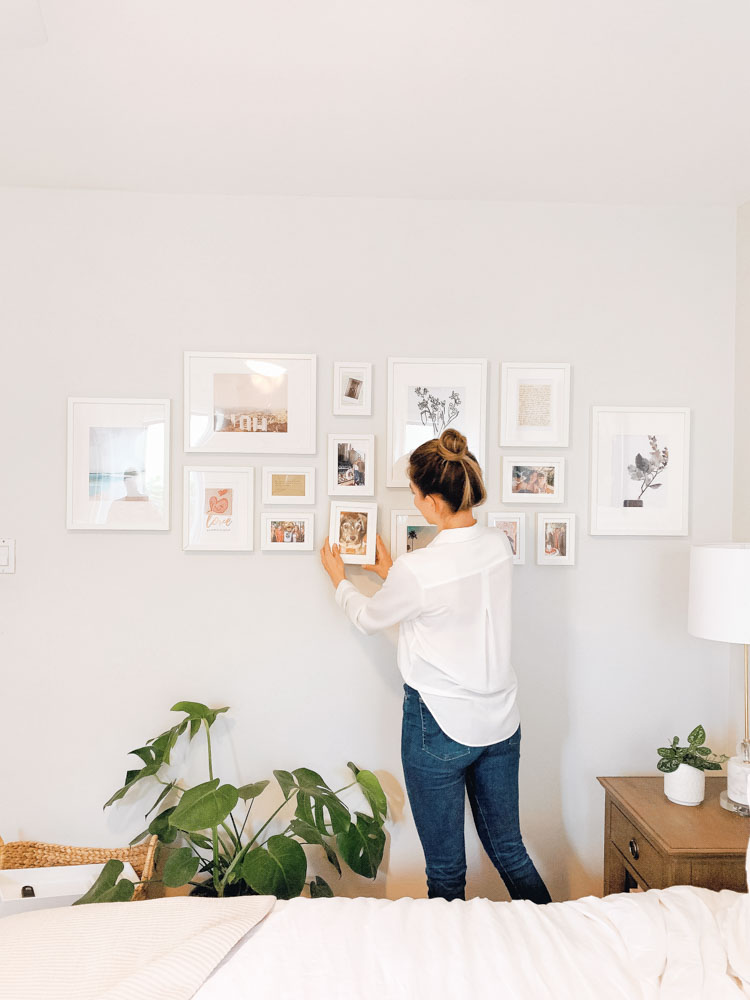
1. Complete worksheet 3. Think about how you want to view your photos. Do you want to create a gallery wall or make photo albums? Make a shareable online gallery? Use the worksheet for inspiration. Implement a few of my favorite tips below:
2. Curate a gallery wall. Refresh your home and bring it into the present with an intentional gallery wall. Before printing, consider using a photo collage maker to plan your layout and experiment with different image combinations for a cohesive display. Pro Tip: Use clean white frames to mix and match a simple collection with ease.
3. Create photobooks. Great for gifts, and super special for kids, photobooks are a great way to turn your memories into a tangible heirloom. My current faves? Mixbook and Artifact Uprising.
4. Style your shelves. Personalize and bring some life to your selfies. What shelves could use a little personal touch?
5. Create a sharable album, video, or slideshow. You did all this hard work, why not share it? Try an app like SmugMug, Google Photos, or Shutterfly.
For more photo and archival goodies, check out the Simply Spaced Shop and Favorite Photo products in our Amazon shop, and don’t forget to grab a copy of my book with a special chapter on photo organization.


Also which photo box did you use ? I purchased one and I can’t find dividers to fit in it
Hi Jen! Photo albums are great for special occasions, or specific trips, or made digitally when all physical photos are scanned and backed up, but I like to keep my printed photos in one box. The large one holds up to 2500 photos and can be found in our shop!!
[…] Grouping by year is one of several ways you can categorize. Other options include by person, family, events, etc. Check out this post for more info: How to Organize and Store Your Printed Photo Collection. […]